The Fundamentals of Exposure: Aperture, Shutter Speed and ISO – Part II


In the last post we talked about what apertures, shutter speeds and ISO are and what they do.

We learned that aperture is about the amount of light the sensor receives, shutter speed is about the length of time the sensor is exposed to the light and ISO is about the sensitivity of the actual sensor itself.

You also had a little play around with changing these settings and looking at what affects they have on an image.

This time we are going just a little deeper and we will talk about how these relate to each other when determining an exposure.

Firstly, let’s remember back to when I told you about the aperture, shutter speed and ISO numbers. I’ll jot them down again to refresh your memory, but I’ll start them from the ones you will be most involved with when shooting hand held:

Apertures:                 f1    f1.4    f2    f2.8    f4    f5.6    f8    f11    f16    f22    f32

Shutter speeds:        1/15   1/30   1/60   1/125   1/250   1/500   1/1000   1/2000   1/4000

ISO:                            100     200     400     800     1600     3200     6400     12800

From these numbers you will notice that they are all different units of measurement. That can get confusing, so photographers invented the term “stop” to represent changing from one of these numbers to another. So rather than saying “my photo is too bright, so I’m going to close the aperture down from f2.8 to f4 which will halve the light coming through the lens” we can just say “I’m going to close the aperture by a stop.” When we get together as photographer we just say “I’m stopping down my aperture” and we know what the other photographer means.

Each progression from one of the above numbers to another in sequence represents either a doubling or a halving of light depending on what direction your sequence is running.

If your aperture is set to f2.8 and you stop down to f4, that is a halving of the light coming through the aperture by one stop. F4 to f5.6 halves it again by one stop, as does f5.6 to f8 etc. Now go back the other way and we will be doubling the amount of light coming through the lens by one stop. F8 back to f5.6 is a doubling of the light and represents a one stop increase in light. F5.6 to f4 is another doubling of light and represents another increase in light by one stop. Does that make sense?

What about if we change from f2.8 to f5.6 (skipping f4)? How many stops of light decrease is this? Yes, its a two stop decrease in exposure, just as f8 to f22 (skipping f11 and f16) is a three stop decrease in light… and so it goes on.

Same goes for shutter speed. If I am set to 1/250th sec on my shutter speed and I want to speed up the shutter by one stop, I will set the shutter speed to 1/500th sec and I will have halved the time the shutter remains open. What about if I wanted to slow the shutter down by a stop? Can you figure it out? One stop slower than 1/250th sec is 1/125th sec and this will cause the shutter to open for… that’s right! Twice as long as it did at 1/250th sec and will represent a one stop increase in exposure.

You have probably guessed by now that the same goes for ISO. So how many stops of light does a move from ISO 100 to ISO 800 represent? Yup, three stops of light increase in sensitivity. Move it from ISO 800 back to ISO 400 and you have just halved the sensor’s sensitivity to light. Easy, right?

Here is an image which was exposed three times, one stop apart. The first is under exposed by a stop, the second is at the “correct” exposure and the third is over exposed by a stop:

DSC_3428-2


DSC_3428

This image is actually about half a stop overexposed by most people’s standards. I like my images bright so I regularly overexpose a little to achieve that (which is why I said “correct” in parenthesis). The images are still exactly one stop apart. The top image is one stop darker and the lowest image is one stop brighter.


DSC_3428-3The above examples are simply designed to give you and impression of what a stop of light looks like in an image.

Now, you will have noticed that your camera doesn’t just move up and down by one stop. All three points of the exposure triangle (aperture, shutter speed and ISO) actually change in 1/3 of a stop increments. That isn’t confusing now though, is it? You know what a stop is now, so the idea of breaking it into three pieces is no different than cutting up a small pizza into three pieces.

When you cut your pizza, you are still free to take one piece, two pieces or even the whole pizza depending on how hungry you are… or you might even eat too whole pizzas (don’t worry I won’t tell). Same with changing camera exposure settings. Sometimes you might only want 1/3 of a stop increase in exposure, sometimes you might want a whole stop or even more.

In the old days, they only had one stop increments to work with. They had to change from f4 to f5.6 because there was nothing in between, no other options.

Your camera however will be able to change in the following sequence f4 – 4.5 – 5 – f5.6 – 6.3 – 7.1 – f8 and so on in 1/3 of a stop increments. Same goes for moving through shutter speeds on a modern digital SLR 1/500 – 400 – 320 – 1/250 – 200 – 160 – 1/125 and so on. Your ISO will also move in 1/3 of a stop increments like this ISO 200 – 250 – 320 – 400 – 500 – 640 – 800 etc.

Note: It will be worth noting that a change from say, f4.5 to f6.3, is still regarded as a one stop increment as is a change from ISO 320 to 640 for example. They are both 3 X 1/3 = 1 Stop.

This may be a little confusing at first (which is why it is handy to learn the full stop whole numbers for aperture, shutter speed and ISO), but it will be easier as you go along, I promise!

That is probably enough for now. Next time we’ll look at the camera’s exposure meter, what it show us and how to use it as a “guide” to take stunning images in manual mode.

Until then…

Feel, think, shoot!

The Fundamentals of Exposure: Aperture, Shutter Speed and ISO – PART I


Shooting in manual mode is simple and fun and results in much better and more satisfying images than handing over the decision making process to your camera.

We have already been playing around with choosing White Balance (WB) manually with pleasing results, which you will admit is rather simple when you get a grip on it. The next step is taking more control of exposure as well as WB.

But first, it might be handy to review the three points of the exposure triangle: Aperture, Shutter speed and ISO.

Aperture – Controls the amount of light getting to the sensor.

Shutter speed – Controls the time the sensor is exposed (to the amount of light the aperture is letting in)

ISO – Controls sensitivity of the sensor to the  light it receives based on the aperture and shutter speed.

Lets start with the aperture and understand what it achieves in your image. Then we’ll deal with shutter speed and then ISO.

Aperture: It’s a little about amount and a lot about creativity

Aperture is another word for ‘opening.’ It is simply an variable opening within the lens that lets light into the camera body to allow the film or sensor to be exposed to the scene in front of it. That’s it.

What is special about this opening is that it can change in size and, even cooler, you can control what size it changes to, thereby controlling how much light it lets through to the camera sensor.

Remember, we don’t want to get all techy here, so I’ll keep it simple. Each lens has a certain number of aperture settings which changes from lens to lens. These aperture settings are represented by a number either on the aperture ring of the lens or the numbers in the little LCD on your camera with the ‘F’ in front of it (it is also called an “F stop.” The F stands for factor of Focal length… but you can disregard that… or google it!).

The number is symbolic of the size of the opening, and all you need to know is this: a SMALL number (like f2.8) is a LARGE opening and a LARGE number (like f22) is a SMALL opening.

Now you don’t need a physics degree to know that a small opening will allow less light in than a large one. So the aperture you choose has a significant impact on the AMOUNT of light coming through to the sensor.

However, for me, the most important thing to remember is that aperture has a very cool creative impact on your images. Have you ever seen a portrait with nice blurry background where the elements loose any shape and form and everything melts into everything else while the subject herself just pops out in sharp perfect focus? That is a large aperture at work (small number – f1.2-f2.8)… among other things, but more about that later. Here is an example shot at f2.8 (large opening):

_PE76406-Edit

What about that stunning landscape image that seems to have the foreground rocks just as sharp and in focus as the middle ground lake and the background mountains? That too is a result of aperture choice. A smaller aperture (say f16) allows you to maintain more sharpness (focus) from front to back. Here is another example, but shot at f16 (small opening):

egener_July2011_0995_2

Also, you can get cool sun stars from some lenses by choosing a very small aperture like f22:

DSC_1967BW

So in all of these images, I’ve used chosen the aperture based on what creative ‘look’ I wanted the image to have, and that is the best reason to choose an aperture.

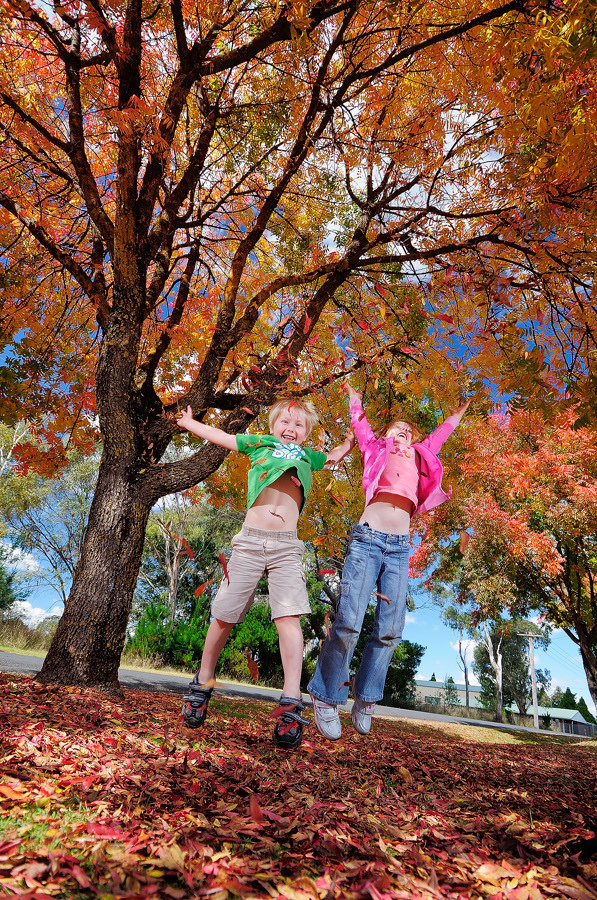
Most zoom lenses that come with your SLR camera will have a variable aperture. This means that the aperture changes as the lens zooms in. Most prime lenses (they don’t zoom) have fixed apertures. That means that when I am shooting with my 50mm f1.8 prime lens, when I set the aperture to say f2.2, it just stays there… which is convenient. To make a fixed aperture zoom is very complex and results in a heavier, larger and more expensive lens. The picture of the boy under the tree was taken with my 1.8kg and quite large 80-200 f2.8 fixed aperture lens.

Now do the following exercise.

EXERCISE: Let’s have a look at what the aperture looks like at different aperture settings. Take your camera and, using the mode dial on the top left of the camera, set the camera to M (manual mode). Don’t be scared, these will not be keepers! If you are using a film camera, do it without the film!

Now set the camera’s aperture to the largest number it has. That might be f16 or f22 or even bigger. You will be changing the number after the F in the info panel.

Now set the shutter speed to 1″ (one second). You will be changing the number that is next to the F number you have already changed. So now you might have set something like 1″ at f16.

Once you have set the aperture to the largest number and the shutter speed to 1″, turn the camera around and allow some window light to fall into the lens barrel so you can see inside it through the front element of the lens. You will be shooting yourself in the face, so to speak.

Now simply press the shutter release button and you will hear “click-one second delay-click.” But the most interesting thing is that you will see the aperture actually appear in the lens for that 1 second. If you want to see it for longer just set the shutter speed to 2 or 3 seconds instead (or find your preview button and press that for as long as you like).

Now you can simply change to another aperture setting and see what the aperture looks like at that setting and pretty soon you will understand the relationship between the numbers and the size of the opening and how that relates to the amount of light it will allow.

Note: when you are changing  aperture settings, set only the main numbers for now which are one of the following:

f1.4   f2   f2.8   f4   f5.6   f8   f16   f22   f32    (it is worth committing these to memory!!!)

The other numbers that you’ll see as you scroll along in your info panel are 1/3 increments between the full aperture numbers (once upon a time, lenses only actually changed between the full number settings as the lenses didn’t have 1/3 increments… aren’t we lucky now? )

Shutter Speed: It’s all about TIME

In your camera there is a screen that is covering your sensor (or film), blocking any light from reaching it. It is called a shutter. When you click your shutter release button and hear the ‘click’ sound, that sound is partly made up of the shutter actuating. When this happens the shutter moves in such a way as to allow the sensor to be exposed to the light that the aperture is letting through. That’s why some people call making an image, ‘making an exposure.’

How long the shutter permits light to expose the sensor for is determined by the shutter speed you set on the camera. So, while aperture is about the amount of light, the shutter speed is all about TIME (Tv = Time Value).

However, the shutter speed has some creative power of its own. A slow shutter speed of say 1/25th to 1/40th of a sec (25 or 40 in your info panel) give you action shots with a sense of movement like this panning shot:

DSC_1255

A shutter that is faster, say 1/250th and higher, give you frozen action shots like this:

12Apr_AutumnLeaves_030


Really slow shutter speeds like around 1 second, give you cool water action like this (though you’ll need a tripod):

11Dec_SWR_034BW


So you can see that creativity is also the best reason to choose your shutter speeds!

Note: Shutter speeds should usually be set at about the same number as the focal length you are using (unless you have some kind of vibration reduction on your camera or lens). So if you are shooting with a 105mm macro lens, you will need at least 1/100th of a second. With a 35mm? Try 1/30th of a second or faster. 50mm? go to 1/50th.

Now do the following exercise.

EXERCISE: Remember the exercise on aperture? Hopefully your camera is still set up that way on manual mode, set at 1″ and whatever aperture you were last using is fine. This time, rather than look at the aperture, you will be listening for the ‘click’ of the shutter as it actuates. It is actually two clicks.

Press the shutter release at 1″ and you will here “click-long one second pause-click.” So that’s two clicks right? Now set the shutter speed to a faster shutter speed, say 1/10th sec and press the shutter button. The clicks are a little closer together, aren’t they? That means that the sensor is being exposed to the light coming through the aperture for a shorter period of time than it was at one second. To be precise the sensor was just exposed for 1/10th of a second!

Now set the shutter to 1/250th sec and press the shutter button. The “click-click” is almost one sound now, isn’t it? That means that the exposure of the sensor was much less time at 1/250th sec than it was at 1/10th sec (logical, right?). Your camera probably actually goes to 1/4000th sec or 1/8000th sec. Now that is fast!

Now set 1/250th again, and work your way down to 1″ again, listening for the shutter sounds to start getting further apart. I can usually hear when the shutter reaches 1/40th of a second and I know without looking that I am getting into camera shake territory and might have to start changing apertures or ISO to get the shutter speed up again to avoid those blurry photos.

Note: when you are changing  shutter speeds, set only the main numbers for now which are one of the following:

1″     1/2 (2)    1/4 (4)    1/8 (8)     1/15 (15)    1/30 (30)     1/60 (60)     11/125 (125)    1/500 (500)    etc.  (these are worth committing these to memory too!!!)

The other numbers that you’ll see as you scroll along in your info panel are 1/3 increments between the full shutter speed numbers (once upon a time, cameras only actually changed between the full number settings as they didn’t have 1/3 increments… aren’t we lucky now? )

ISO: The honey bees

ISO stands for International Standards Organization which was the body responsible for film speed ratings. Film speed refers to the ability of a particular film emulsion to respond to light. Faster films reacted faster to light than slower films, therefore faster film could be used in lower light levels.

Some common film speeds you may remember from the film days (if you are old enough) are ISO 50 (slow and smooth), 100, 200, 400, 800, 1600 (fast and grainy). Well, we still use the ISO rating to measure a sensor’s sensitivity to light… Easy!

So ISO 100 is a slow speed ISO. This usually results in the smoothest and highest quality image from a digital sensor. As you go up in ISO, the image quality deteriorates because the image starts to get ‘noisy’ which is kind of like a dirty digital version of grain (film grain looks cool, digital noise doesn’t). Take your camera and set it to ISO 3200 and take a shot of some shadows. Now zoom into the image on the cameras LCD and look closely at the little flecks in the shadows. Looks sandy or grainy. That’s noise and that is the reason we want to keep the ISO as low as possible for best image quality.

So how do you use ISO?

Well, lets assume you are shooting a natural light portrait of your child in the late evening with an 85mm lens at f1.8. Since this is the largest aperture your lens has you can’t physically let any more light in. However, you can slow your shutter speed to allow the light in for longer. Only in this case you are already at, say, 1/30th of a second and your images are coming out blurry from camera shake (remember the focal length/shutter speed rule?). So in this case you can’t allow the light in for longer because it would only make he images even more blurry. So what do you do?

You look at your ISO! Just so happens you have your ISO set to 200, because you wanted better image quality. So since you would rather have this shot of your child than none at all, you decide to accept a higher ISO and set it to ISO 400. What happens now?

Well the sensor is now twice as sensitive to light as it was at ISO 200. That means you can halve the time by setting the shutter speed to 1/60th sec. Is that fast enough for the 85mm lens? Maybe it will be if you have a steady hand. Try it…snap! Oh, just a little blurry, huh? Well why not try ISO 800? What shutter speed can you set now? That’s right, 1/125th. That should do the trick with some speed to spare.

In Bryan Peterson’s excellent book, Understanding Exposure, he makes the analogy that the ISO setting is like honey bees carrying pollen. The more honey bees you have he more pollen gets taken into the bee hive. In this analogy, the higher the ISO (more bees) the more light (pollen) reaches the sensor. That may be useful. If you can’t get a fast enough shutter and your aperture is where you want it for its creative intent, you just need more bees to carry some more light to the sensor.

Now remember, you have just set your camera to ISO 800 to take that natural light portrait in the example above, so remember to change it back to ISO 100 or 200 for next time you take your camera out into the world. We only want to change that ISO if we can’t change the aperture or shutter speed first.

EXERCISE: This time, you can choose a scene and simply shoot the same scene (inside will be best) in any mode that allows you to change the ISO manually. Simply start at ISO 100 (or LO.1) and shoot at each whole ISO rating until you reach the highest. Now zoom in on a shadow portion of your image and then scroll through all the images and take note of the noise you will see as grain in your photo. It often looks pretty bad at very high settings. Scroll through and notice how the grain gets less and less and virtually disappears by the lowest settings. Can you understand now why you only want to increase ISO as a last resort? Look again and find the highest ISO setting where the noise is acceptable. My Nikon D700 has acceptable noise at ISO 3200 if the exposure is correct and the image is bright. The noise will be even worse when your image is under exposed (not exposed for long enough). Go on, try it for yourself.

Note: And yes, those pesky 1/3 increments reveal themselves in the ISO too. The whole numbers are as follows:

ISO 100, 200, 400, 800, 1600, 3200, 6400 and 12800 (yup, good to memorise too!!!)

Next time we will talk a little more about how the aperture, shutter speed and ISO relate and get into just a tiny bit more detail to further your comprehension of this important concept in understanding exposure. For homework you could order Understanding Exposure by Bryan Peterson as it is one of my most recommended books for budding photographers.

Until then…

Feel, think, shoot!


Taking more control of your White Balance for better images

We’ve been talking about how we can control White Balance (WB) by using the pre-set pictorial WB controls in our camera’s WB menu.

So, when we are shooting on a sunny day, we know that we can get a close to correct colour temperature by setting our camera’s WB to ‘daylight.’ Alternatively, when we are shooting portraits in open shade or on a cloudy day, we could set our WB in the camera to ‘cloudy’ and we will get pleasing warm images.

This is a great way to simplify the WB choices we make, when we want to take control away from our camera. However, there is an easy and more accurate way to find the best WB for a particular shot without having to carry a WB card around. Simply use the ‘Kelvin’ mode in your camera’s WB menu.

Now, if you have been following along with the other posts, you will know how to set your WB to the WB pre sets that the camera has built into the menu. You will have found the little button labelled with ‘WB’ and the arrow buttons or wheel you need to use to change the settings and cycle through the pre sets, which are symbolised by the little pictures as illustrated below:

Figure 3

Figure 1

However, on more high end cameras, you’ll also have a ‘K’ mode that allows you to set actual Kelvin colour temperatures from 2000- 10000K. If you have this feature read on. If not take a look at my previous post.

While the pictorial settings (as illustrated above) are a good approximation of the colour temperature of the light you may be shooting in, setting the WB using the ‘K’ option in your camera’s WB menu is more accurate.

Since I am mostly shooting portraits in open shade  I find myself using between 6000K to 7500K most of the time. The actual setting I end up using will depend on how deep the shade is and what natural light source I am facing my subject into. 6250K is a favourite start point and I can easily adjust from there.

This may initially seem pretty complicated as most features of a modern digital SLR can first appear. But if you persist and practice changing these settings based on what you see or like in the LCD screen, you’ll soon be doing this fairly intuitively without thinking too much about it.

So let’s look at an easy workflow that will quickly get you to the right WB setting and allow you to get on with your picture taking without worrying about the inconsistencies the Auto WB feature will sometimes produce.

Here’s what I do most of the time when shooting a portrait:

1. Take a test shot at what the camera recommends as correct exposure (I usually am working in manual mode but sometime lash out with aperture priority – A ).

2. Eyeball the LCD and the histogram and adjust the exposure to taste (usually leaning toward a little over exposure – anywhere from +0.3 to +1.7 usually… I just like lighter brighter images). I find white balance is easier to assess when the exposure is right for the image.

3. By this stage I would also have recognised whether the WB is either looking too cool, too warm or just right. So, I  would then adjust the WB as needed so that the image on the LCD looks pleasing and according to the mood want (or my creative intent for the image if other than a portrait). Click, check, etc until it looks good.

4. Click, click, click away…

I would do the above for every new location or lighting situation that develops throughout the shoot. So all those numbers can be confusing, but if you have managed to get your head around the last post you will know the following about these colour temperature numbers that will help keep you on track:

You’ll know that 2500K is a cool temperature, but that light at that temperature appears warm (like the sunrise).

You’ll also know that 9000K is a warm temperature, but that light at this temperature appears cool (like deep shade).

You’ll also know that 5500K is a more neutral light (white) that is neither warm nor cool in appearance.

Now, what is most important for using this method is that you know that, for any given image, setting a LOWER temperature (lower K number) will COOL the APPEARANCE of your image down and setting a HIGHER temperature (higher K number) will WARM the APPEARANCE of your image.

So, say I am shooting a portrait at 6250K in deep shade and I notice that, on the LCD screen, my image looks a little cool for my liking (i.e. the skin tones are too bluey grey rather than natural and warm). What would I do with my WB settings? Would I set a lower temp and cool the image down, or a higher temp and warm it up? That’s right, I’d set the temperature higher to warm it up. Maybe I’d only need 6500K. Maybe 7000K would be more like it. Whatever the case, I know I can keep setting the temperature to a higher number until I get it looking right on the camera LCD.

So say I decide to go with 8500K and take a shot, finding the image a little too warm in appearance. How would I cool it down in appearance? That’s it, set a lower temperature (maybe to 8000K or 7500K… just depends on what you want the image to look like).

Here is another example. Say I’m in ‘Cloudy WB’ (6500K) and I take a shot that looks too cool (blue). I might then decide to warm the image up by shooting at ‘Shade WB’ (7500K). However, now I think the image is too warm. So what I am really wanting is a temperature somewhere between 6500 and 7500K. Easy! I just set the WB menu to ‘K’ and select 7000K as a start point and either warm it a little or cool it a little based on my needs. Simple.

This method also works on my camera in Live View mode (Lv). Turn on live view, then cycle through the Kelvin temperatures until you see what you like. Then go back to using the viewfinder and fire away.

Remember, dial the temperature down to cool the image down and dial it up to warm the image up.

Easy, huh? MUCH more intuitive than trying to remember that cool light is a low temperature but it appears warm! etc. etc. etc. Blah, blah, blah!

Now go an shoot this way for a week or two and you will have internalised this skill to the point on unconscious competence. Well done! Next time we will be looking at using your camera in fully manual mode to get better and more consistent exposures, but until then…

Feel, think, shoot!

EXERCISE 1: Now remember the exercise from the last post? Do the same with this method of WB adjustment. For example, find a scene in even light and just start at the coolest Kelvin temp setting your camera has (2500K?) then simply shoot a shot of the same subject/scene in the same light changing the setting to a warmer temperature each shot. I.e. Shoot your first shot at 2500K, then shoot your next at 2700K then another at around 2900K and so on until you hit your upper temperature (10,000K?). Now scroll through and take note of how the image changes.

EXERCISE 2: Now just pick a temperature, say 5500K and take a shot. Before you look at the photo, try to guess what it will look like for the current scene. Now have a look. How did you go? Not so good? It doesn’t matter, its just an exercise remember, but keep doing it until you get pretty good at predicting for that known scene in front of you. When you are scoring some hits, go and shoot in a different location and start guessing again. Before long you’ll be a pro!

Taking control of your White Balance for better images

Last time we found out that white balance (WB) and exposure are two very important things to get right in the camera if we want to take successful photos (In this post I am going to assume you shoot in JPEG [image file name suffix will be ##.jpg]. If you shoot in RAW this is not that important but I still manually set my WB when shooting RAW to speed my workflow up). For now, lets talk about WB.

So what is WB? The answer is more involved than you might think. But we’re not going to get too carried away with complex explanations around here, are we? So here it is in very simple terms. WB refers to how colours and neutrals (white to dark grey) appear in our images. This is also referred to as colour temperature and it is measured in something called the Kelvin (K).

We all know what temperature is. It’s an objective measurement of how hot or cold something is. If I say it’s -8 deg C outside, you’ll think, Brrrrrr! So, you already have your head around degrees Celcius. Well, the Kelvin is just a more absolute unit of temperature measurement that physicists use to measure the colour temperature of light. That’s it.

All you need to know at this point is that light varies in colour temperature and if your camera is not set to the correct WB setting, for the light you are shooting in, the image may have a colour cast that affects its aesthetics. You’ve probably already noticed this with some images you’ve taken.

You can actually see the colour temperature changes for yourself every morning. What colour is the light at sunrise? Yellowy-Orange, right? That apparent warm light early in the morning doesn’t last though, does it? It changes over time until you get to around midday when the light is whiter/bluer. But then, as the day moves into late afternoon the light becomes warmer in appearance again.

The thing is, you can see the light colour but your camera cannot. It really has no idea what colour the light is. So you have to either let the camera take a best guess (Auto WB) or you can set it yourself. Ideally we’ll want to move away from allowing the camera to make all the decisions for us though, so we will be setting it ourselves.

Time to have a look at your camera. It has some WB settings somewhere which helps us deal with colour temperature variations. Did you find it? If not, go grab your manual and have a look. You’ll notice it has some WB settings pre-programed into it that are represented by pictures bearing a striking resemblance to the ones in the following example (Figure 1):

Here is a sequence of pictures that relate to how the camera will render the colour temperature in your image.

Figure 1: Here is a sequence of pictures that relate to how the camera will render the colour temperature in your image.

The above table has the little symbol and the words with it. The camera will only usually have the symbols so learn what they mean. Nikon, Canon and the others have similar pictures to make it easy and this knowledge transferable from camera to camera. Yay! Now lets have a look at a colour temperature chart:

Notice that the 'warmer' light colour is actually cooler in temperature and 'cooler' colour is warmer in temperature.
Figure 2: Notice that the ‘warmer’ light colour is actually cooler in temperature and ‘cooler’ colour is warmer in temperature.

The chart starts with orange light at around 2000K and goes up to blue light at 16000K. So as the light moves from orange to white to blue the temperature of the light is getting warmer. This is counter intuitive for most people and can be a stumbling block. But it is actually natural. Take fire, for example. Fire is always hot of course, but as its relative temperature increases, the flame becomes bluer. For example, a match is orange and a steel cutting blow torch glows blue. Which is hotter? (rhetorical question).

So it is actually a natural phenomenon that the cooler the light, the warmer it will appear. This may be a little confusing, but getting your head around it will be important later on when you are making these decisions yourself.

So we know that there are some pre-programmed settings in the camera we can manually control that help us set the WB. We have also seen that the colour of light changes between a ‘warmer’ appearance of cool light, and a ‘colder’ appearance of warm light. But how do these little symbols in Figure 1 correspond to the actual colour temperatures in Figure 2?


Auto Mode

Every camera has an auto mode. Canon has the little ‘AWB‘ and Nikon has a little ‘A‘ In this mode, the camera will choose the WB setting for you but may not be very accurate. It will try to find a neutral shade in the image like white, and base its response on that. However, if the white it choses has a colour cast (which it won’t see) the result may be a little off or totally horrible! You don’t want to let the camera routinely choose ‘Auto WB’ for your creative images.

Note: the following images are the same image, shot in RAW format with a variety of WB setting applied in my RAW conversion software (Nikon Capture NX2). But, remember, all of these settings can be made right in the camera, I’m only simulating after the fact with my RAW processing software.

Here is an example of when ‘Auto WB’ can get it pretty wrong. This model’s name is “Maverick,” in case you were interested (pretty handsome, hey?).

This is the straight out of camera shot (SOOC) and over exposed a little as I usually do (ETTR). It was pre-set manually using a WB tool called an Expodisc. It usually renders the image a little too high in Magenta for my liking but it gets pretty close. The actual colour temperature that the Expodisc set the camera to was 5780K.

This is the straight out of camera shot (SOOC) and over exposed a little as I usually do (ETTR). It was pre-set manually using a WB tool called an Expodisc. It usually renders the image a little too high in Magenta for my liking but it gets pretty close. The actual colour temperature that the Expodisc set the camera to was 5780K.


Here the Auto WB setting attempted to correct the magenta in the original image by adding too much blue. If you are set to Auto WB and your camera is left to make the decisions this kind of thing can happen in camera too. However, as cameras get better, so does their Auto WB. Having said that, if you shoot JPEG, you will be better off in most situations using a pre-programed WB setting like daylight, cloudy etc.

Here the Auto WB setting attempted to correct the magenta in the original image by adding too much blue. If you are set to Auto WB and your camera is left to make the decisions this kind of thing can happen in camera too. However, as cameras get better, so does their Auto WB. Having said that, if you shoot JPEG, you will be better off in most situations using a pre-programed WB setting like daylight, cloudy etc.


The first image is representative of how I shot the photo in camera (with manual WB) and the second is the image with ‘Auto WB’ applied. The image was shot in the shade and under natural light coming from the sky after the sun had moved behind some huge pine trees (open shade). Have a look and tell me what you notice about the image’s colour.

The second is that the Auto WB image has noticed that magenta cast in the original image and tried to correct it by adding a blue cast… and not very successfully. So Auto features are great, but they are not always accurate.


Incandescent WB (Tungsten 3500K)

The next setting is the ‘Incandescent’ setting (the symbol looks like a little light bulb – Figure 1). As you may know, the average tungsten incandescent light bulb (3500K) is the culprit to those orange low light images you took inside back in the film days with daylight balance film. The light is cool in temperature so it appears, what? That’s right, cool temperature light appears warm.

On the Incandescent (tungsten) setting, the camera assumes you are shooting in an environment lit by incandescent lights.

That’s pretty reasonable, right? Why else would you set your WB to ‘Incandescent?’ So, since you are lit by warm incandescent light, the camera will add some blue in order to balance the light back closer to average white light (5000-5500K – see Figure 2).

Here is an example of the same image set to ‘Incandescent’ WB:

Here the Incandescent setting assumes that the dog is lit by incandescent light (a very warm toned light) and adds blue to correct it to a more normally balanced light.

Here the Incandescent setting assumes that the dog is lit by incandescent light (a very warm toned light) and adds blue to correct it to a more normally balanced light.


It’s a little too blue isn’t it. However, if the dog were shot in a room under a lamp lit by a tungsten (incandescent) bulb, it may well be right on the money.

Also, imagine you actually wanted your image to have a cool blue mood but the camera rendered the image a more natural appearance. What could you do in camera to change the appearance of your image before shooting it again? Are you getting the picture? Can you understand why even something as absolute as colour temperature is still a tool you can use creatively?


Fluorescent WB (4000K)

If you set the camera WB to ‘Fluorescent’ it will assume you are shooting under conditions lit with fluorescent lights (the camera WB symbol looks like the Fluorescent tube).

These days, there are many different kinds of lights that fall into this category. They range from 3300-4700K or thereabouts, but the standard setting is about 4200K. They often have a greenish cast to them (though many light bulbs today are close to a daylight WB… Yay!) so the ‘Fluorescent’ setting will attempt to balance the green with magenta.

Have a look at the result below after ‘Fluorescent’ WB has been used:

Fluorescent light is green. So what does the camera think when you put the WB in the Fluorescent setting? It assumes your subject is lit with green light and corrects it by adding magenta. Cool, isn't it? Can you tell me what a misty hilly landscape might look like if you shot it in Fluorescent WB setting?

Fluorescent light is green. So what does the camera think when you put the WB in the Fluorescent setting? It assumes your subject is lit with green light and corrects it by adding magenta. Cool, isn’t it? Can you tell me what a misty hilly landscape might look like if you shot it in Fluorescent WB setting?


Daylight WB (5500K)

The ‘Daylight’ WB is represented by the little ‘sun’ on your camera and is around 5200K. However, like all of these pre-programed settings, the daylight setting is an approximation and actual daylight colour temperature varies depending on what time of day it is.

When set to daylight, your camera will assume you are working under daylight conditions lit by a bright blue sky and balance colour accordingly.

Are you understanding how the camera is applying its logic here yet? Here is the same image adjusted to ‘Daylight’ WB.

Now we are looking a little better. Know why? Have a think about it. The image was shot in the afternoon in an area lit by the open sky. That is a long way from warm tungsten light or green fluorescent light, but not that far from standard daylight colour temperature. Getting a handle on this yet?

Now we are looking a little better. Know why? Have a think about it. The image was shot in the afternoon in an area lit by the open sky. That is a long way from warm tungsten light or green fluorescent light, but not that far from standard daylight colour temperature. Getting a handle on this yet?


Here you can see that the image, since it was shot in conditions close to daylight (closer than incandescent or fluorescent) is actually not looking too bad as the cameras assumptions were closer to correct.

In fact, someone might think this is perfect for the image, and that’s fine too. Are you seeing that even in the area of White Balance, there is room for creative interpretation?


Cloudy WB (6500K)

By now you’ll probably be saying, “Since cloudy light is actually warmer in colour temperature than the WB settings we’ve looked at so far, the light will appear cooler. And since the camera will assume I am taking a picture in cooler looking light, it will add some yellow to balance the light back to a more average colour.”

If you were thinking along those lines, you ‘d be perfectly correct. In this WB setting the camera will make the above assumptions and add some combination of (red/yellow/orange) to reverse the blue tint characteristic of a cloudy day light. Well, done!

See, it’s really not that complicated. Here is the image after applying the ‘Cloudy’ WB setting.

CloudyDog6000K


Notice the warmer tones? Looks nice, huh? Maybe even worth keeping in mind for those portraits of the kids you are thinking about taking soon (I like to start with around 6250K when shooting portraits in open shade).


Shade WB (7500K)

The ‘Shade’ WB setting is around 8000K and makes the image look even warmer than the ‘Cloudy’ WB (because shade colour temperature is higher than cloudy colour temperature). It adds more of the warm tones since the light it assumes you are shooting in is even cooler looking light than on a cloudy day.

Notice how orange Maverick looks now:

This setting assumes you are in very blue light of shade. So the camera does its thing and adds some warmth. It doesn't work for this image as it was not shot in cold shade light. If it was, it would look more normal to the eye and less warm. It is only that the image was already shot in a warmer looking light than shade that this image looks too warm. In other words, the camera simply added more warmth than was necessary because it though I shot it in shade instead of the open sky light I actually shot it in. Make sense?

This setting assumes you are in very blue light of shade. So the camera does its thing and adds some warmth. It doesn’t work for this image as it was not shot in cold shade light. If it was, it would look more normal to the eye and less warm. It is only that the image was already shot in a warmer looking light than shade that this image looks too warm. In other words, the camera simply added more warmth than was necessary because it though I shot it in shade instead of the open sky light I actually shot it in. Make sense?


So as we see, when you manually set a WB setting in the camera, the camera will assume you are shooting in that kind of light and add or subtract cool or warm tones depending on the setting you have chosen. It will do this simply in an attempt to balance the image’s colour to a more mid-range temperature.

We have also learned that the real world actual temperature of light is varied along a spectrum from (for our purposes in photography) around 2000K (low temp that looks warm) on one end and 10,000K (high temp that looks cool) on the other.

Since this variation is the norm, the WB settings in camera are a simple approximation of the current temperature in which you area shooting. However, we have also seen that, even though these in camera settings are an approximation, they can do a much better job at colour balance than the ‘Auto WB’ setting on your camera.

The final choice I made for this image was 6250K which I set manually in post processing, but this lies somewhere between Daylight (5500K) and Cloudy (6500k), and to be honest, I would have been happy with either Daylight or Cloudy if I could not manually adjust the WB in post processing.

Now here is a little hint at what to do when you can’t find a WB setting that looks good or the lighting is so mixed that adjusting all those sources is either impossible or just too much work:

If you try and try to get the WB right and the lighting is just too mixed up to effectively manage with in camera settings, just shoot B&W! :o)

If you try and try to get the WB right and the lighting is just too mixed up to effectively manage with in camera settings, just shoot B&W! :o)


Convert it to Black and White!

Next time we will look at how I usually adjust WB on the fly by using that other mode we didn’t look at; the Kelvin mode. Do you have one on your camera? It’s usually at the end after the Shade setting. Look up your manual and learn how to find it and adjust the temperature numbers manually so you’ll be ready to tackle the next post.

Until then… Feel, think, shoot!

EXERCISE: Shoot the same scene multiple times using the same exposure settings, but changing the WB settings with each shot. Cycle through the WB presets. What does each look like under the same exposure and lighting conditions for the same scene? Now go outside and shoot a sequence in the sun. Then go and shoot a sequence in the shade. It doesn’t matter what you shoot, its just an exercise, but play around with the various WB presets so you begin to understand how they affect your images. Don’t stress, just have fun and get to know that camera through some quality time with it.


How to improve your images in two easy steps

Have you ever taken a shot of a great scene or subject only to be deeply disappointed with the little image on the back of your camera? Maybe it was too dark, a weird or funky colour or even a combination of the two. Yes? Me too. So what is going on here?

There are many factors that influence the quality of your images. Composition, timing, focus, correct settings for your creative intent, lens choice and actually having a vision for your image before you shoot it are a few. However, two of the most important things you need to get right before pulling the trigger are Exposure and White Balance (WB). Thankfully, especially in the digital age, these are two of the easiest things to manage with a little trial and error.

Exposure simply relates to how bright or dark your image is.

White Balance (WB) on the other hand relates to how true, or not, your colours will render in the final image.

Both exposure and WB affect the image independently and in different ways but when you get both right in your camera for any given image the photograph will sing.

Before we get to carried away with techno gobbledygook let’s see an example.

The first is poorly exposed (too dark) and inaccurately colour balanced (too orange) and the second reflects one that has been made at the “correct” exposure and WB (I’ll explain why I put that in quotation marks later).

Daylight WB (5200K) and under exposed by about 1 stop.

Daylight WB (5200K) and under exposed by about 1 stop.


This image has had the exposure increased to brighten it in post processing and has had the WB adjusted (cooled) to 3700K which is close to your cameras Fluorescent setting.


So as you can see, just by getting the exposure and WB closer to “correct” (there are those quotation marks again) we can dramatically improve an image.

The very cool thing about this that even though I have made these corrections in a RAW converter during post processing (on my computer) I can do exactly the same thing, quickly and easily, in camera before even taking a shot just by taking control away from the camera. Once you have discovered how to choose WB and adjust exposure manually you will wonder how on earth you managed without it, and your photography will take on a whole new dimension.

So what’s all this about the quotation marks? Well, in reality I believe there is really no such thing as “correct” exposure and WB. That is to say that I think the exposure and WB the camera chooses may not always serve your intention or vision for the image. But this may be a bit ‘artsy’ for someone who still hasn’t figured out where to adjust his or her camera’s WB. So just file that away for now, as you consider the next example:

This image was adjusted in exposure as the second image, but the WB was set even cooler to about the same as the Incandescent setting on my camera (2700K) which I feel better serves my creative intent and the way my son was feeling about the situation - so the treatment was more about conveying a mood than being "correct" per se.

This image was adjusted in exposure as the second image, but the WB was set even cooler to about the same as the Incandescent setting on my camera (2700K) which I feel better serves my creative intent and the way my son was feeling about the situation – so the treatment was more about conveying a mood than being “correct” per se.

In the image above, I adjusted the exposure to make it brighter but I actually wanted to make the colour (WB) even cooler than the “correct” setting (second image above). I did this because the context was a cold clinical setting and the discomfort and fear was palpable to me so cooling the image best conveyed how both my son and I felt about the situation. So, in this sense, the final image is actually the correct exposure and WB for this image because it creates the mood that I intended for my photo.

So, did that make sense? If not, don’t stress. The take home here is twofold:

1. Exposure and WB are two of the most important decisions when making successful images so learn how to adjust these on your camera.

2. “Correct” exposure and WB settings are more about the mood you want to create in your image as opposed to what your camera might be suggesting.

So how do you manually adjust exposure and WB on your camera? Go and find your specific camera’s manual because we’ll be talking about these two things in the next two posts. First, we’ll look at WB and then manual exposure.

Until then… Feel, Think, Shoot.